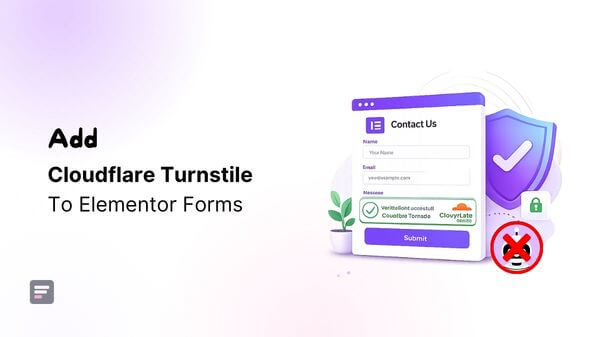
Forms are easy targets for automated bots. These bots scan websites, find forms, and submit them repeatedly using fake names, invalid email addresses, promotional messages, and suspicious links.
As a result, your inbox and Elementor submissions area quickly fill with spam. This makes it harder to identify genuine enquiries.
Even though basic protection methods such as hidden Honeypot fields can stop simple bots, they are not enough when a form receives frequent or more advanced spam submissions.
In such cases, adding a stronger verification method like Cloudflare Turnstile helps confirm that the person submitting the form is a genuine visitor rather than an automated script.

But the problem is that Elementor Forms does not currently include a native Cloudflare Turnstile field. To use it, you need an additional integration (Cool FormKit) that connects your Elementor form with Cloudflare’s verification service.
In this guide, we will show you step-by-step how to add Cloudflare Turnstile to Elementor Forms using Cool FormKit.
Why Cloudflare Turnstile Over Traditional CAPTCHA?
A traditional CAPTCHA interrupts almost every visitor before they submit the form and asks them to prove they are human by selecting images, typing distorted text, or completing another challenge, which is frustrating, especially on mobile devices.
However, Cloudflare Turnstile works more like a security guard. It checks browser and visitor signals in the background. Most genuine visitors can continue without solving a puzzle, while suspicious requests will receive an additional check.
This creates a smoother and more accessible form experience while still reducing spam.
| Feature | Traditional CAPTCHA | Cloudflare Turnstile |
| User Experience | Requires users to solve image, text, or puzzle challenges. | Mostly invisible or requires only a simple checkbox when necessary. |
| Ease of Use | Can be frustrating and time-consuming. | Fast, seamless, and user-friendly. |
| Bot Detection | Uses challenge-response tests to distinguish humans from bots. | Uses browser signals and non-intrusive background checks to verify users. |
| Privacy | Some CAPTCHA services collect user data for tracking or analytics. | Focuses on privacy and does not use data for ad targeting. |
| Performance | Additional challenges can slow down form submissions. | Lightweight with minimal impact on page performance. |
| Form Completion Rate | Higher chance of users abandoning forms due to difficult challenges. | Better completion rates thanks to a frictionless verification process. |
| Integration | Available for most websites but often requires users to interact with challenges. | Easy to integrate on any website without requiring Cloudflare’s CDN. |
| Spam Protection | Good protection but increasingly challenged by modern bots. | Uses adaptive risk analysis and browser verification for stronger protection against automated abuse. |
Steps to Add Cloudflare Turnstile to Elementor Forms
Follow the steps below to integrate Cloudflare Turnstile into your Elementor forms:
Step 1: Install Cool FormKit Plugin
- First, make sure that you have installed and activated Cool FormKit from the WordPress Dashboard > Plugins.
After activation, make sure you have “Turned on“ the Cloudflare Turnstile feature in the WordPress Admin Panel >> Elementor >> Cool FormKit >> Form Elements Tab.
Step 2: Set up Site Key and Secret Key
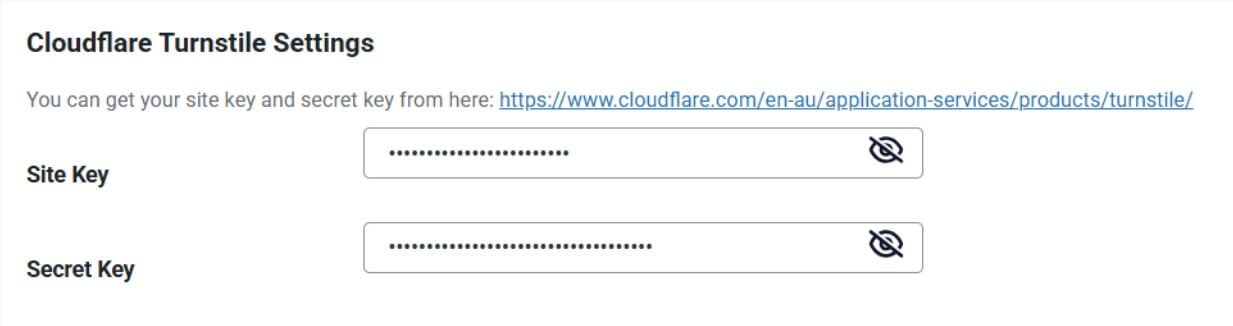
To make Cloudflare Turnstile work with your Elementor form, you must connect your website to Cloudflare’s verification system. This is done using two keys: Site Key and Secret Key.
You can generate them from Cloudflare Turnstile.
- Once you’ve generated the keys, paste them into the WordPress Admin Panel by navigating to: Elementor >> Cool FormKit >> Settings >> Cloudflare Turnstile Settings.
Step 3: Add Turnstile to the Form
- Navigate to the Content section of your Form Field. From the Field Type dropdown, select Cloudflare Turnstile.
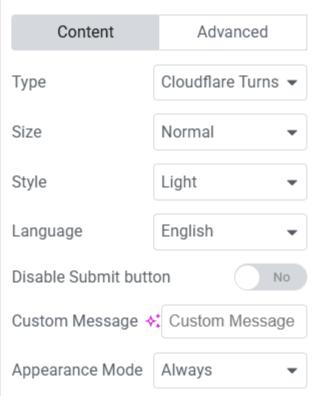
- Once you’ve implemented Cloudflare Turnstile, you can customize it using the following options:
- Size: Select the size of the widget from Normal or Compact.
- Style: Choose the visual theme: Light or Dark to match your form’s design.
- Language: Select the Cloudflare Turnstile language (e.g., English, Spanish, French).
- Disable Submit Button: Enable/disable the form’s submit button until Turnstile verification is complete.
- Custom Message: Set a personalized error or guidance message for Cloudflare Turnstile.
- Appearance Mode: Control the display of the Turnstile widget.
That’s it. By integrating Cloudflare Turnstile with Cool FormKit, you can enhance both the security and user experience of your Elementor forms.
Final Thoughts
Cloudflare Turnstile offers a modern solution by protecting your forms without interrupting genuine visitors with image puzzles or complex challenges.
When combined with Cool FormKit, you can easily add Turnstile to Elementor Forms, improve spam protection, and maintain a smooth user experience.
Once you’ve completed the setup, take a few minutes to test your form and verify that submissions work correctly. A properly configured Turnstile widget helps ensure your forms stay secure while making it easier for real visitors to get in touch.
Frequently Asked Questions
Does Elementor support Cloudflare Turnstile by default?
Elementor currently provides reCAPTCHA, reCAPTCHA v3, and Honeypot fields in its native Form widget, but it does not provide a native Cloudflare Turnstile field. So, you need an additional addon such as Cool FormKit for Elementor Turnstile integration.
Do I need Elementor Pro to use Cloudflare Turnstile?
You need Elementor Pro when using Elementor’s default Form widget. Cool FormKit also supports its own form widget for Elementor Free, its own Cool Form widget, and compatible options such as Hello Plus Form Lite.
Does my website need to use Cloudflare DNS?
No. Cloudflare states that Turnstile can be embedded into any website without requiring the site to use Cloudflare’s CDN.
Where can I get the Cloudflare Turnstile Site Key and Secret Key?
To get your Cloudflare Turnstile Site Key and Secret Key, log in to your Cloudflare account and open the Turnstile section from the dashboard. Click Add Widget, enter your website’s hostname (domain), then choose the widget type and other settings according to your requirements, and then create the widget.
Once it’s created, Cloudflare will generate a Site Key and a Secret Key. Copy these keys and paste them into your website or plugin settings to enable Cloudflare Turnstile protection on your forms.
Which Cloudflare Turnstile widget mode should I use?
Managed mode is suitable for most Elementor forms. It automatically decides whether the visitor needs to interact with the widget based on the detected risk level, and Cloudflare identifies it as the recommended mode.
Why is Cloudflare Turnstile not showing in my Elementor form?
Confirm that the Turnstile feature is enabled under Elementor > Cool FormKit > Form Elements. Check that the field has been added to the form, clear all caches, and make sure optimization or security settings are not blocking scripts from challenges.cloudflare.com.
Can I use Cloudflare Turnstile and Honeypot together?
Yes, they can generally be used together because they detect spam in different ways. However, test the form carefully after enabling both and avoid adding several CAPTCHA providers to the same form.
Can I customize the Turnstile widget in Elementor?
Cool FormKit allows you to adjust the widget size, light or dark style, language, appearance mode, custom validation message, and whether the Submit button remains disabled until verification is complete.
Will Cloudflare Turnstile stop all Elementor form spam?
Turnstile can significantly reduce automated bot submissions, but it may not stop every manually submitted or highly advanced spam message. Additional content filtering or submission controls may still be useful for heavily targeted forms.