Elementor Forms are a great way to interact and collect information from visitors.
But there is a common problem that every website owner faces after publishing an online form: Spam Submissions.
Well, spam submissions are fake or unwanted form entries that are typically generated by automated bots rather than real visitors.
These submissions include fake names, invalid email addresses, promotional messages, suspicious links, or meaningless content.
Besides cluttering your inbox with spam entries, spam submissions also make it harder to identify genuine enquiries, waste valuable time, and can even affect your website’s performance if left unchecked.
Even though the Elementor form provides basic spam protection like reCAPTCHA, however basic protection is not enough to stop advanced spam bots.
So, you need Cool FormKit to add stronger spam protection to your Elementor forms.
In this guide, you’ll learn what Cool FormKit is, available spam protection options in Cool FormKit, how it works, and steps to add it to your Elementor forms.
What Is Cool FormKit?
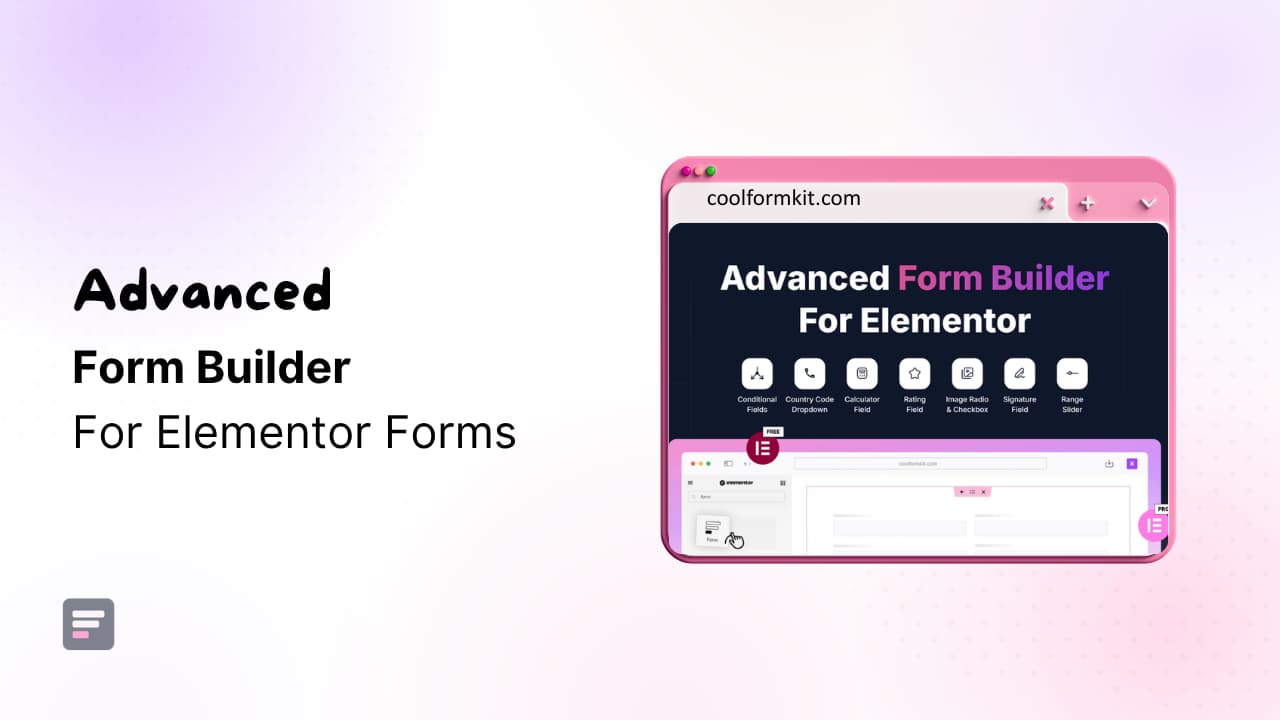
Cool FormKit is an advanced form builder for Elementor Free users.
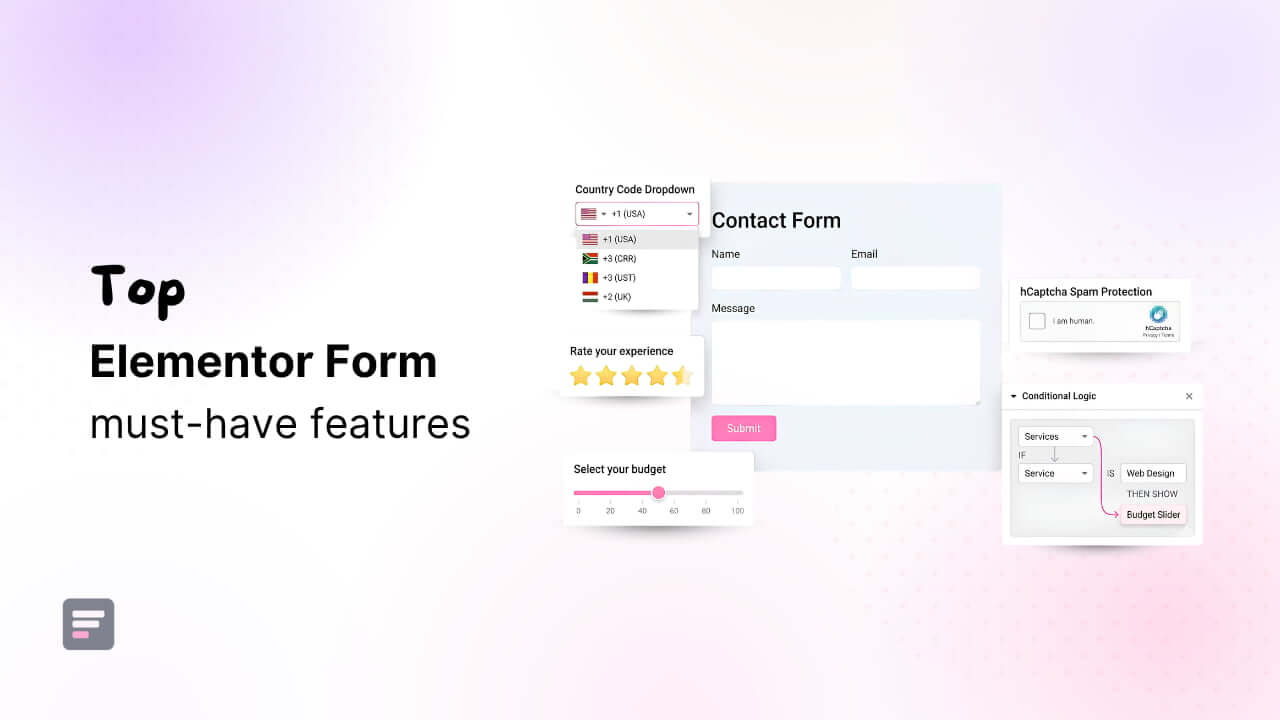
It extends Elementor Pro and Hello Plus form widgets with 25+ advanced features like conditional logic, country code, WhatsApp redirect, Spam Protection fields, and more.

For spam protection, Cool FormKit provides three main options:
- Cloudflare Turnstile
- hCAPTCHA
- Spam Blocker
Each method handles spam in a different way, the right option depends on the type of form you have and the amount of spam you receive.
Now, let’s understand each method in detail.
1. Cloudflare Turnstile
Cloudflare Turnstile is a user-friendly method for protecting Elementor forms from automated spam.
Unlike traditional CAPTCHA systems, it usually verifies visitors in the background. Users do not need to solve image puzzles, enter codes, or complete any complicated challenge.
Cloudflare Turnstile checks the visitor’s activity in the background and confirms whether the form submission is genuine or not.
This makes it a suitable option for websites that want strong spam protection without affecting the form submission experience.
How to Add Cloudflare Turnstile to an Elementor Form
Follow these simple steps to add a Cloudflare Turnstile in Elementor forms:
- Firstly, make sure you that you have installed and activated the Cool FormKit plugin.
- After installing and activating the plugin, enable the Cloudflare Turnstile feature in the WordPress Admin Panel >> Elementor >> Cool FormKit >> Form Elements Tab.
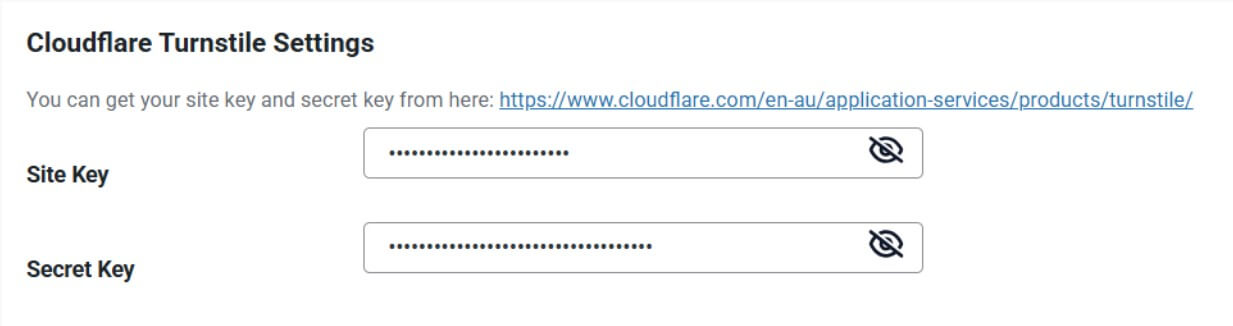
Set up Site Key and Secret Key
To make Cloudflare Turnstile work with your Elementor form, you must connect your website to Cloudflare’s verification system. This is done using two keys: the Site Key and the Secret Key. You can generate them from Cloudflare Turnstile. Once you’ve generated the keys, paste them into the WordPress Admin Panel by navigating to: Elementor >> Cool FormKit >> Settings >> Cloudflare Turnstile Settings.
- Navigate to the Content section of your Form Field. From the Field Type dropdown, select Cloudflare Turnstile.
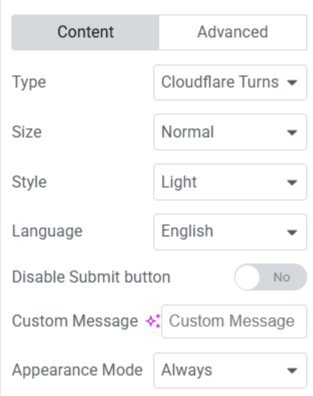
- Once you’ve implemented Cloudflare Turnstile, you can customize it using the following options:
- Size: Select the size of the widget from Normal or Compact.
- Style: Choose the visual theme: Light or Dark to match your form’s design.
- Language: Select the Cloudflare Turnstile language (e.g., English, Spanish, French).
- Disable Submit Button: Enable/disable the form’s submit button until Turnstile verification is complete.
- Custom Message: Set a personalized error or guidance message for Cloudflare Turnstile.
- Appearance Mode: Control the display of the Turnstile widget.
- After satisfied with all the changes, publish your page and preview it.
2. hCAPTCHA
hCAPTCHA is another spam protection method available in Cool FormKit.
It verifies whether the person submitting the form is a genuine visitor. Depending on the visitor’s activity, hCAPTCHA may ask users to complete a simple challenge, such as selecting matching objects from a group of images.
This additional verification step makes it more difficult for automated bots to submit fake entries.
hCAPTCHA is a good option for websites that receive frequent spam and need a more visible verification method.
How to Add hCAPTCHA to an Elementor Form
Follow the steps below to add hCAPTCHA to your Elementor forms:
- Firstly, make sure you that you have installed and activated the Cool FormKit plugin.
- After activating the plugin, enable the hCAPTCHA feature in the WordPress Admin Panel >> Elementor >> Cool FormKit >> Form Elements Tab.
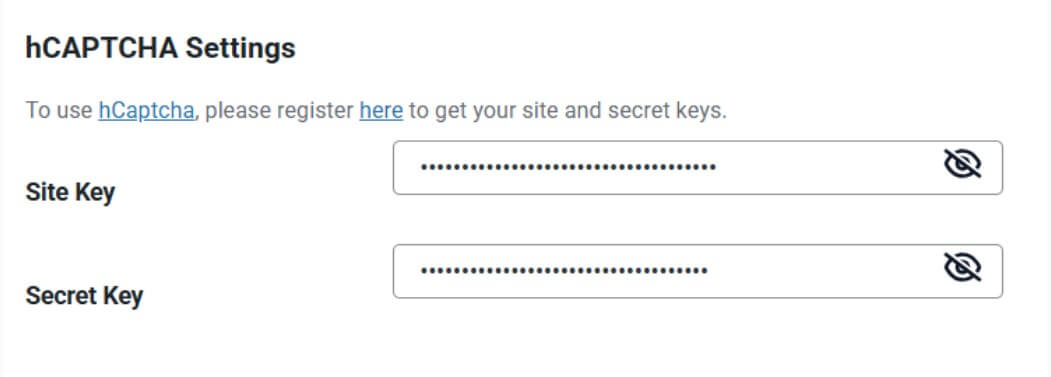
Set up API Keys
The Site Key and Secret Key are essential credentials that link your website to hCAPTCHA’s verification system. You can easily generate them from hCAPTCHA. Once you’ve generated the keys, paste them into the WordPress Admin Panel by navigating to: Elementor >> Cool FormKit >> Settings >>hCAPTCHA Settings.
- Navigate to the Content section of your Form Field. From the Field Type dropdown, select hCAPTCHA.
- Once you’ve implemented hCAPTCHA, you can customize it using the following options:
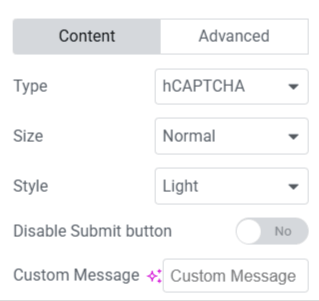
- Size: Select the size of the hCAPTCHA widget from Normal or Compact.
- Style: Choose the widget style from Light or Dark theme according to your website’s design.
- Disable Submit Button: Prevent unverified form submissions by disabling the submit button until CAPTCHA is completed.
- Custom Message: Set a personalized error or guidance message for CAPTCHA.
- After satisfied with all the changes, publish your page and preview it.
3. Spam Blocker Feature
The Spam Blocker feature works differently from Cloudflare Turnstile and hCAPTCHA.
It does not ask visitors to solve a challenge or complete any verification.
Instead, it checks the information entered into the form and compares it with the filtering rules added by you.
For example, suppose you regularly receive spam messages containing the same website address or promotional phrase.
You can add that URL or phrase to the Spam Blocker settings. Any future submission containing the same value will then be blocked automatically.
This gives you more control over the type of information users can submit through your forms.
Follow the steps below to add a spam blocker to Elementor Forms:
- Firstly, make sure that you have installed and activated the Cool FormKit plugin.
- Then, from your WordPress dashboard, navigate to WordPress Admin Panel >> Elementor >> Cool FormKit >> Settings.
- Scroll down to the Spam Blocker section.
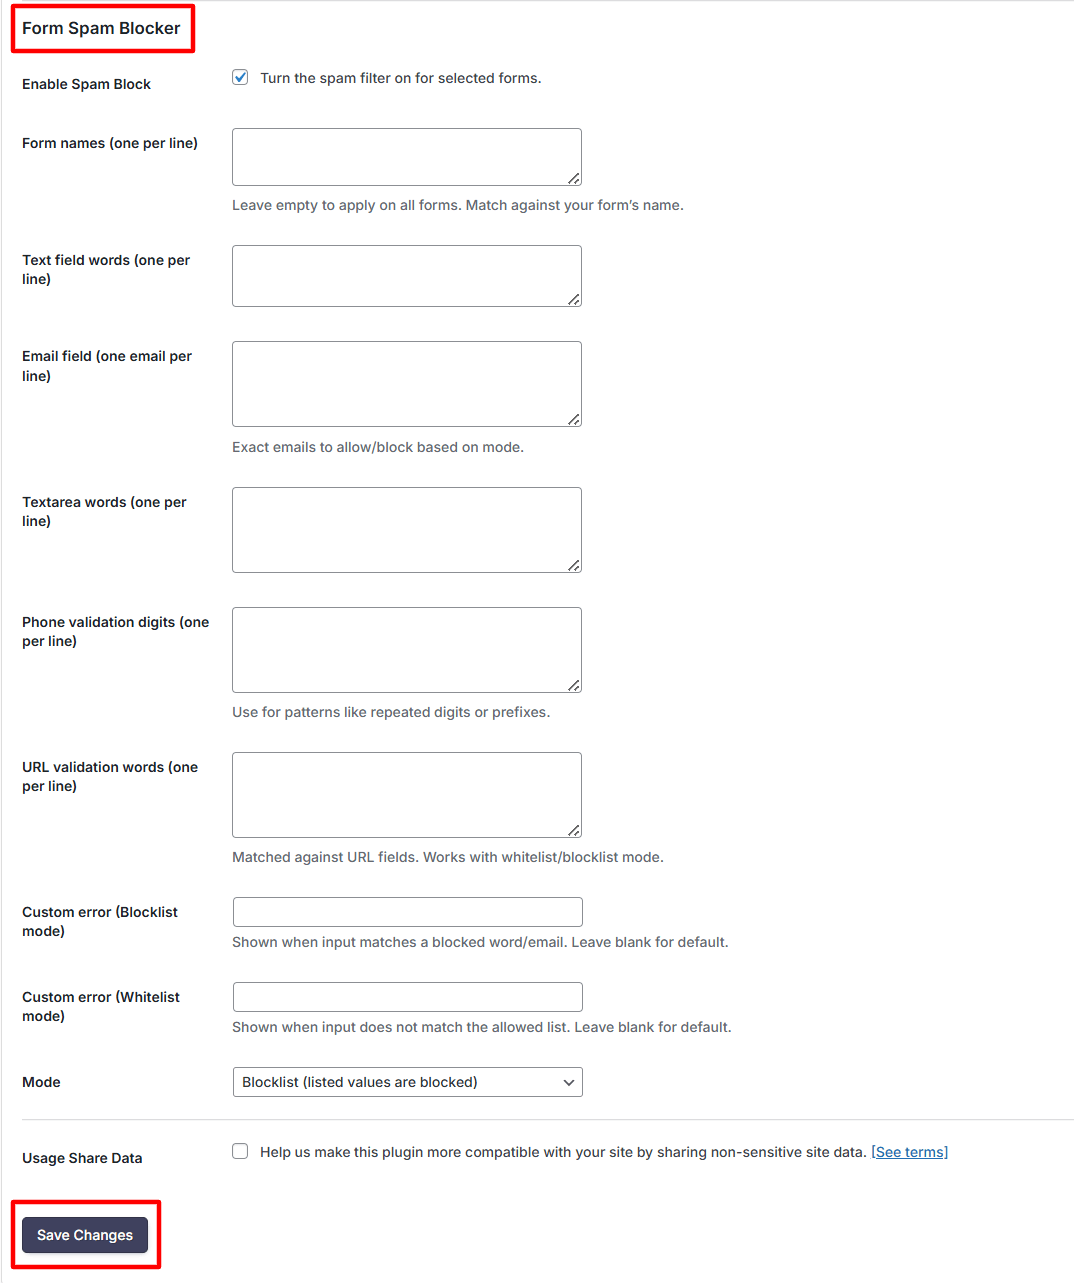
- Enable Spam Block: Turn on the option to activate spam filtering for your forms. Once enabled, the plugin will start checking form submissions based on the rules you define.
- Form Names (one per line): Enter each form name to which you want to apply spam filter or leave this field empty to apply spam filtering to all forms automatically.
- Text Field Words (one per line): Add specific words or phrases that you want to block or allow in text input fields based on the selected mode (blocklist or whitelist).
- Email Field (one email per line): Enter email addresses that you want to block or allow based on the selected mode (blocklist or whitelist).
- Textarea Words (one per line): Add words or phrases that you want to block or allow in textarea fields (such as message fields) based on the selected mode.
- Phone Validation Digits (one per line): Enter number patterns, repeated digits, or prefixes to validate phone number inputs and detect spam or invalid entries.
- URL Validation Words (one per line): Add keywords or domains to validate URLs submitted in form fields, based on the selected mode (blocklist or whitelist).
- Custom Error (Blocklist Mode): Enter a custom error message that will be shown when user input matches a blocked value.
- Custom Error (Whitelist Mode): Enter a custom error message that will be displayed when user input does not match the allowed values.
- Mode: Choose the spam filtering mode: Blacklist or Whitelist.
- In Blocklist mode, any value you add will be blocked, meaning if a user enters something that matches your list, the form will not be submitted.
- In Whitelist mode, only the values you add are allowed, and anything else will be rejected.
- Lastly, click the Save Changes button.
Now that we have discussed each method in detail, the right option depends on the type and amount of spam your website receives.
Which Spam Protection Option Should You Use?
| Protection method | Best for | User experience |
| Cloudflare Turnstile | Most contact, support, and lead forms | Excellent |
| hCAPTCHA | Forms receiving frequent bot submissions | Good |
| Spam Blocker | Repeated words, emails, URLs, and phone patterns | Excellent |
For most websites, Cloudflare Turnstile is a good starting point because it usually verifies visitors without showing a visible challenge.
Use hCAPTCHA when your forms receive frequent spam, and you want stronger challenge-based verification.
Use the Spam Blocker when your unwanted submissions contain the same words, email addresses, domains, phone numbers, or links.
Can You Use Multiple Spam Protection Options Together?
Yes, you can combine different protection methods.
However, you should avoid adding multiple CAPTCHA fields to the same form because this makes the form difficult for genuine users.
A better approach is to combine the Spam Blocker with one verification field.
For example, you can use:
- Cloudflare Turnstile with Spam Blocker
- hCAPTCHA with Spam Blocker
Cloudflare Turnstile or hCAPTCHA verifies whether the visitor is genuine, while the Spam Blocker checks the information submitted through the form.
This creates two layers of protection without adding unnecessary steps for users.
Final Thoughts
Cool FormKit provides three different ways to protect Elementor forms from unwanted submissions.
So, start with the method that matches the type of spam you receive. After configuring any protection method, always test the form from the frontend. This will help you confirm that spam is being blocked while genuine visitors can still submit the form without difficulty.